
Gun Stock Refinishing Process
How to Refinish Gun Stocks
Disclaimer: If the gun you’re considering for refinishing is a collectible, please be advised that any alteration to the originality of the firearm, including refinishing the stock, may decrease the street value of its potential “collectible” status. The street value may mean something or nothing to you. As well, an extremely valuable firearm may be perceived of lesser value if modifications, including gunstock refinishing, are made to it. Really, it comes down to whether you want to focus on the collectible dollar value, or re-do the stock and get a look for your own personal enjoyment.
Keep in mind refinishing a stock can definitely increase the “perceived value” and even street value of any firearm, simply because it looks so much better. I’m not referring to the collectability value of the firearm here, only to what others may be willing to pay for your gun should you want to sell it.
As I, by intent, don’t refinish gunstocks to original “factory” condition but rather to a hand-rubbed custom finish, such refinishing would be classified as an alteration to the originality of the firearm. No responsibility is assumed, therefore, for any decreased value, perceived or otherwise, that could result from my refinishing of your firearm’s gunstock. Thank you for your understanding in this matter.
Cutting it short doesn’t cut it… there are simply no shortcuts in creating fine wood finishes. It’s like assembly-line cars vs. the ‘hand-made’ Rolls Royce.
Essentials are:
- Thorough wood prep that prepares the wood for a new finish
- Selection of finishing oils, hardeners, and drying components to maximize a handcrafted result
- Determining the best application technique to achieve the desired finish and high-end outcome
- Time. It’s not a quick process.
I Communicate with You
Usually the very day I receive your stock I’ll contact you so you’ll know it’s arrived safely. During the work process I may contact you, keeping you up to date on progress or with any questions that could arise. Bottom line ~ you won’t feel alienated as your valued gunstock is being refinished.
How I Perform Your Restoration & Refinishing Process
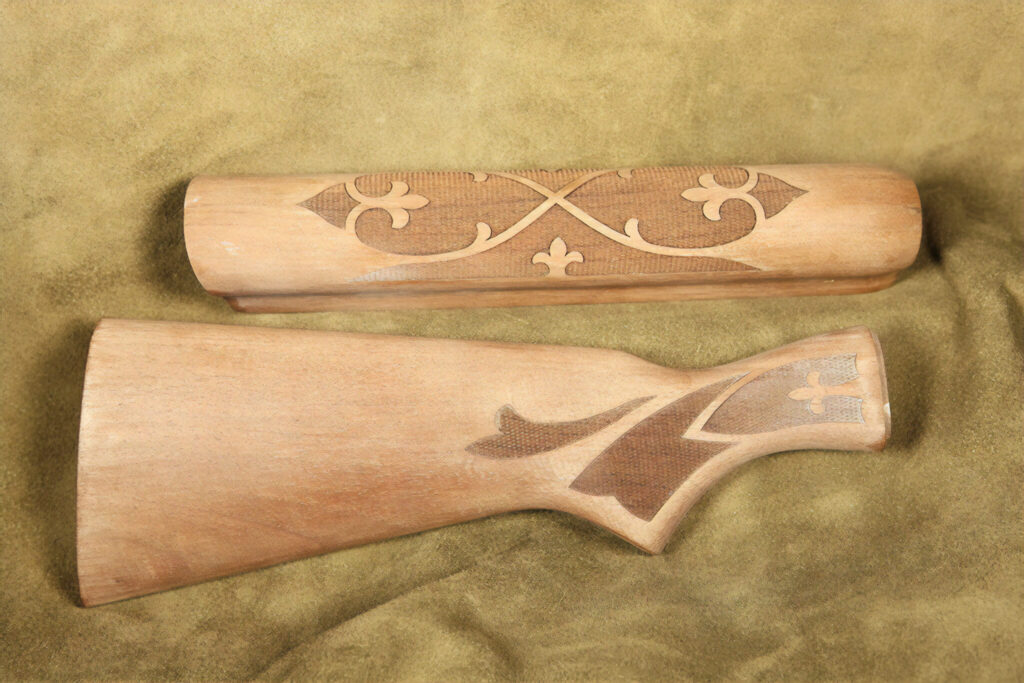
Remove Entire Old Finish —
Finishes on gunstocks vary— and there are many! Home-finishes, varnish, polyurethane, even shellac, and factory epoxy are common. Removal time and technique involved varies by the chemical nature of the finish and how strongly it’s bonded to the wood. Polyurethane seems to be the most common and can be the slowest to remove, depending on the manufacturer.
Wood Preparation —
Remove surface scratches and dents.
Judicious sanding to remove old wood stain and create the crucial uniform wood surface.
Note: gouges, deep scratches, chips out of the wood, and cracked wood are more complicated issues that need to be handled separately.
More complicated refinishing issues need to be discussed before we both commit to your gunstock restoration. The usual issues are as follows:
Staining of the Wood Prior to Refinishing (pros & cons) —
Oft times, better than staining is to simply allow the wood’s inherent color to remain by letting the application of my proprietary finish do its magic of creating the lovely handmade sheen we all admire. This occurs as the quality, hand-rubbed oil blend penetrates below the wood’s surface. In so doing, it reveals the true grain inherent in the wood. Rubbing oil penetrates, making the grain ‘pop!’. The penetrating oil also deepens contrast between light and dark wood fibers (grain), revealing the full beauty of the pattern. (And therein lies the ‘rub’ of hand-finishing
Sometimes, however, stain should be applied, being needed for enhanced visual effect on dull, non-descript wood stocks. Sometimes a really dull wood appearance can be vastly improved with a little color. I’m glad to help you regarding stain application, from an experience standpoint. I may offer suggestions– you make the final call.
Note: Regarding wood color–
The randomness and diversity of wood grain, pattern, and even different wood colors are the characteristics most of us find so appealing in the wonder that is wood. The actual color of any given piece of wood can transition from, say, a dark area to a light one, all within a matter of several inches of distance within the wood’s surface appearance. I’ve seen gunstocks with such diversity of color and pattern, you’d think the stock was made of two pieces of different wood stuck together, so to speak.
In refinishing, therefore, I never try to force (stain) portions of the wood color to match other colors in a given gunstock, but instead, let the wood maintain the diversity of presentation nature has provided.
Applying the New Finish –
In short, applying the new oil-blend finish is labor intense. Sometimes up to 10, even more coats are needed to achieve deep, lustrous beauty. Drying time between coats is at least one day. Drying times also vary, depending on humidity. Once all finishing coats have been applied, curing of the finish is required for maximum hardness and final luster creation.
Curing —
The longer you can leave the stock with me, the more time I can allow for curing (an internal hardening of the finish) which, on most stocks, has to do with my achieving the final luster. Final finishing can’t be done until the cure is at least to a certain point. You can easily handle a finished stock a day or so after the last coat is applied, but at least one week after that is needed before the final creation of the deep luster can be accomplished.
Return Time —
Simply, the more time we give for curing, the greater the hardness and ultimate luster.
As a rule of thumb, I can usually complete the stock in about two weeks to two months, depending on backlog. It’s also difficult to predict exact return time because the way each individual gunstock receives finish, along with humidity conditions, make precise time commitments difficult.
Touch up the checkering —
Over time dirt, grease, and hand-wear can dull checkering detail. It’s labor-intensive and expensive, but carefully light re-pointing the little checkering diamonds does provide a crisp & ‘new’ look and feel to your gunstock.
Most of my gunstock refinishing jobs don’t involve touching up the checkering because just renewing the stock surrounding the checkering so dramatically renews stock appearance. I can, however, do touch-ups for lightly worn checkering that always helps appearance.
HYPER-CLEANING:
I use this hand process for older checkering– talk to me about it.
Complete re-checkering is very pricey and often is not the way to go. Again, talk to me . . .
I do not create new checkering from scratch on blank gunstocks. Touching up existing checkering only.
Choosing the Wood's Surface Texture
Texture means feel– slightly rough as compared to silky smooth; sheen means the look of satin vs. gloss
Two wood surface texture finishes are offered.
1. Unfilled pore texture finish
2. Filled pore texture finish.
First, we need to know how natural wood fibers relate to liquids (oil blends) that are applied to them.
Individual wood fibers within the same piece of wood absorb applied finishes differently. Some fibers act like sponges and quickly absorb, while others more repel absorbency. This creates small voids in the finish, which when viewed closely gives the wood its beautiful texture we so admire.
Chatoyance–
A $100 word having to do with light reflectance. Essentially, you want a little light reflectance from wood pores, otherwise, the wood surface looks like glossy “plastic”, that piano top look, an appearance that most observe as being what it is– cheap. Factory finishes almost always are sprayed on urethane (plasticized variations), and produce no beauty that chatoyance provides.
Tiny voids (pores) can be mostly filled or left mostly unfilled, either being desirable or not, depending on taste.
If these pores are allowed to remain mostly unfilled, the finished surface, though beautiful, has a rough texture that can be easily felt by the hand and seen by the eye. In other words, the surface texture, compared to a filled pore finished surface, is comparatively rough: outdoorsy/the wild-west.
If pores are mostly filled, the wood surface will be smooth and slick, but not as “piano top” or
glass-like slick as are cheaper polyurethane factory finishes described above. The idea of a hand-rubbed oil finish is to not create a glassy or plastic look, but to let the natural texture of the pores slightly catch the light (chatoyance) and in so doing, reveal what makes natural wood so different from wood coated with super-slick synthetic finishes (translated: cheap, quick, and easy to apply; also hard to repair, remove, and which tend to cloud or haze over with time).
You will need to decide which finish you prefer: Both the above results (unfilled and filled textures) are attractive and desirable. Both are achieved through fine oil mixtures and hand rubbing application, are waterproof and durable. It simply depends on which effect you prefer.
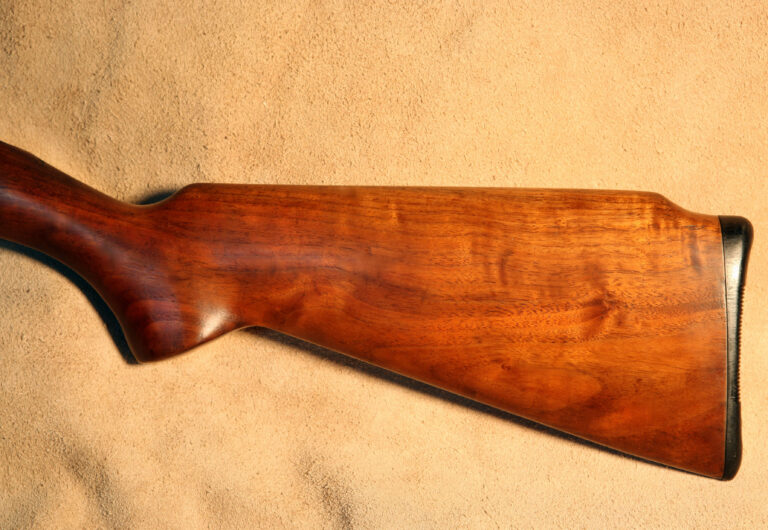
Directly below is a photo of a stock finished in unfilled pore texture. This finish has a rustic appearance, one often characterized by older sport and military firearms. The look is a combination of a decisively custom, yet rugged/rustic appearance, something you might link to ‘Big John Wayne’, for example. (Actually, the photo doesn’t quite capture the more open pore structure. In reality, the unfilled pores are very easy to see. Handsome, but on the rough side.)
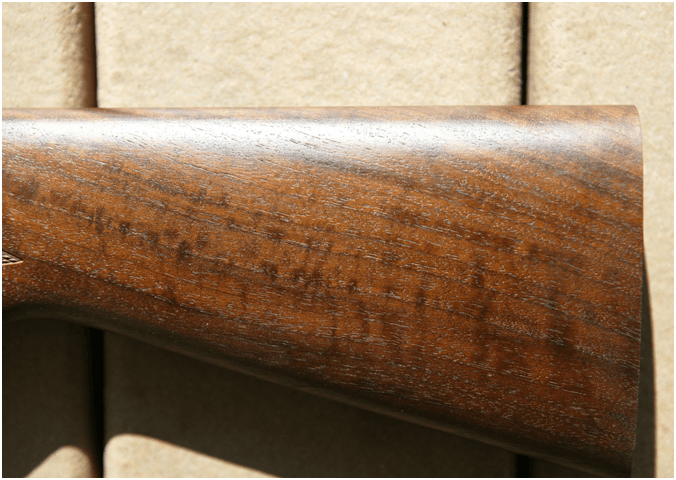
(above) Example of unfilled wood pores. The surface has a rustic ‘outdoor’ texture, you can actually feel. Unfilled wood pores are visually obvious. The sheen is satin.
(below) The stock finished in a filled pore texture finish. This finish has a smooth surface feel and appearance. When the light is just right, it is ‘caught’ in some pores that may yet have microscopic voids at their tops, showing off the inherent color, grain, and wood pattern – chatoyance. “A thing of beauty is a joy forever.”
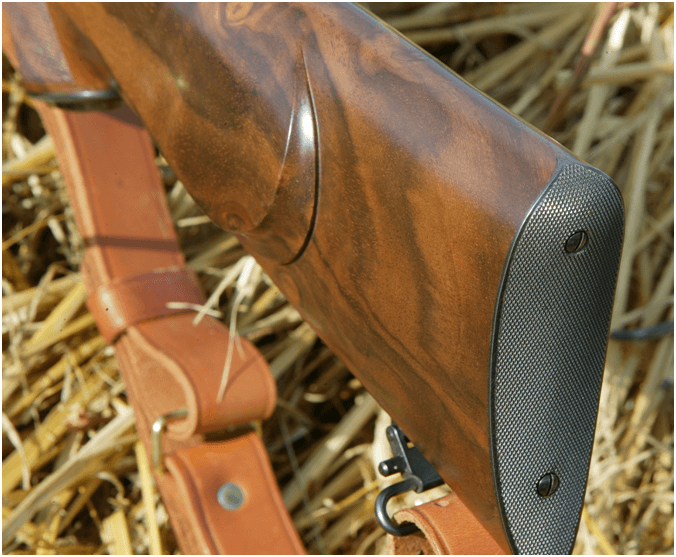
Choosing the Wood's Surface Texture
Gloss vs Satin
Texture and sheen of a finished wood surface are two different things.
Texture has been described above, and in gunstock refinishing refers to a feel that is either very smooth (filled wood pores), or more textured to the touch (unfilled pores).
Sheen, defined as the degree of gloss, only has to do with a visual property, not touch — glossy sheen is really shiny; satin has a glowing shine to it, is softer in appearance, and possesses a lustrous patina. The usual idea in professional gunstock refinishing is to create this patina, making it lustrous, but without the noticeable high gloss that is a more plastic-like appearance. (Browning’s factory finishes utilize this high gloss.)
Surface sheen is highly interpretive: what’s satin to one is, to another, considered glossy. And vice versa. Sheen, therefore, is something to be discussed prior to refinishing your woodstock.
(Note): Most all my surface finishes, by customer (and personal) preference, lean toward a satin to semi-gloss appearance, but not glossy. If your gunstock restoration ideas, however, include a high gloss sheen, by all means, talk to me. We can make it happen!
A Child's First Gun
Before
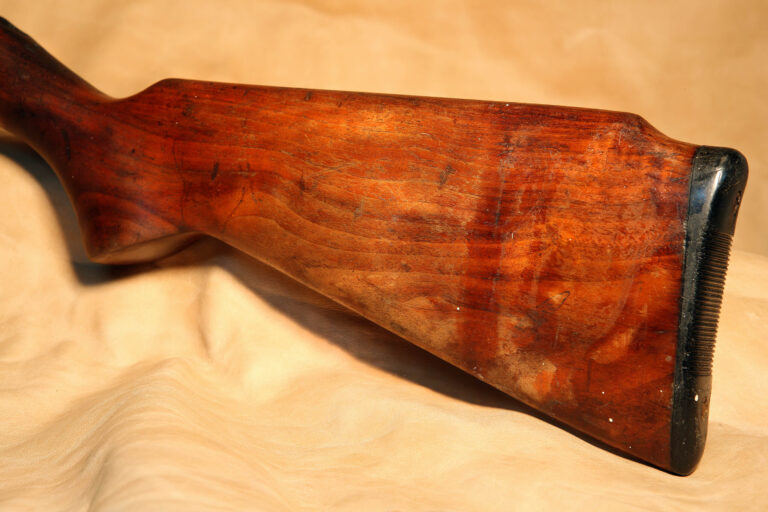
After
This .410 gauge Mossberg shotgun was this little girl’s first gun. She saved up her allowance, then Dad contacted me.
Such a refinishing project is a heart-warmer because passing on hunting and gun safety to a child is simply right– and the American way.
When the old Mossy arrived, the wood was stained, scratched and downright gunky. Refinished, a lovely satin finish was provided, and the beauty of genuine American walnut was again revealed.
Soon after I had return-shipped the finished stock, from Dad I received a nice note along with this sweet photo of one happy gal, enjoying her restored wooden stock and spending duck hunting time with Dad at the lake. Special, it is.


